The defining characteristic of MightyBox’s collaboration feature is its extreme flexibility. It is ensured through the roles and policies mechanic, which provides an ability to share the exact instances and permissions needed for a particular use case. This guide covers all the specifics of roles and policies configuration and provision.
Let’s start by defining what roles and policies are:
- policies are small API sets that allow specific operations
- roles are a combination of policies that create the required range of actions
At the MightyBox dashboard, these entities can be found and managed at the account Settings > Shared by Me section.

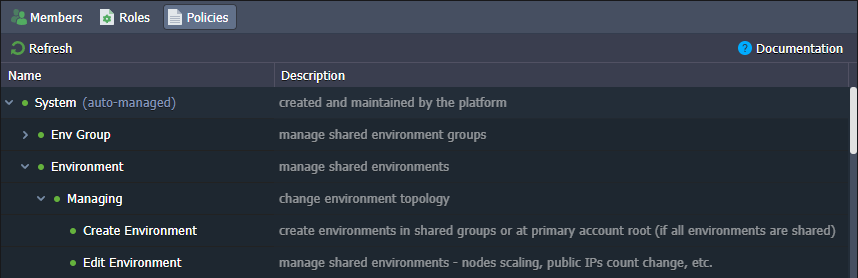
- The Policies tab lists the actions that can be added to a role. By default, the platform provides a comprehensive list of System policies that can be combined for a great variety of roles, covering most of the possible collaboration cases.
- The Roles tab allows you to create custom sets of actions that provide only the required permissions to the collaboration members.

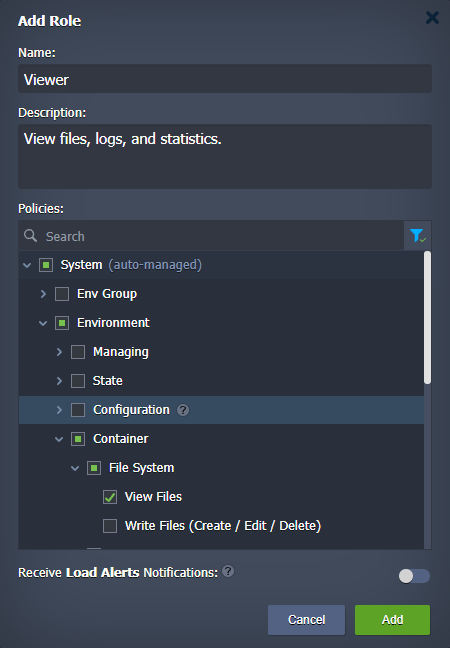
When adding, editing, or copying a role, you need to provide the following data:
- Name – type any desired name for a role
- Description – provide custom description (optional)
- Policies – select actions allowed for a role; use search to quickly locate required policies and filter to review only selected ones
- Receive Load Alerts Notifications – enable to allow collaboration members with this role to receive load alert notifications about shared environments
No longer needed roles can be removed with the same-named button at the tools panel.
- You can create as many roles as you need. Here are some generic examples that can be configured by selecting the appropriate policies:
- viewer – just view logs and files
- user – simple actions like environment start/stop and containers restart
- developer – access to most features with some restrictions (e.g. create, delete, migrate, clone environments, change environment groups, change owner)
- admin – full access with the ability to create new environments, install JPS packages, and access via SSH
Obviously, these are just examples to give you an idea of the feature possibilities. You can create your own roles to suit your specific use case the best.
Roles Assigning Algorithm
The platform utilizes a special access level algorithm when determining the exact roles for a specific environment. Based on the priority (from higher to lower), the three available access levels are ordered in the following way:
- direct – roles assigned directly to the environment. The “direct” roles override any of the roles from the levels below.
- shared env groups – mixed list of roles for all shared groups of the current environment. If a group does not have a specific role, the parent is checked. The nesting chain can be followed till the root Env Groups category (i.e. default role for all groups).
- base – default roles for all shared environments (roles assigned to the Environments category). The “base” roles are of the lowest priority and are applied only when there are no other roles.
You can check the role and list of allowed policies for shared resources at the account Settings > Shared with Me section.
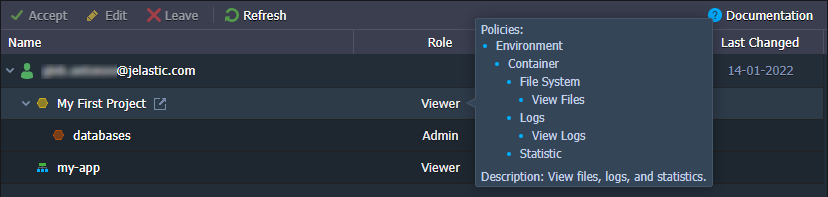
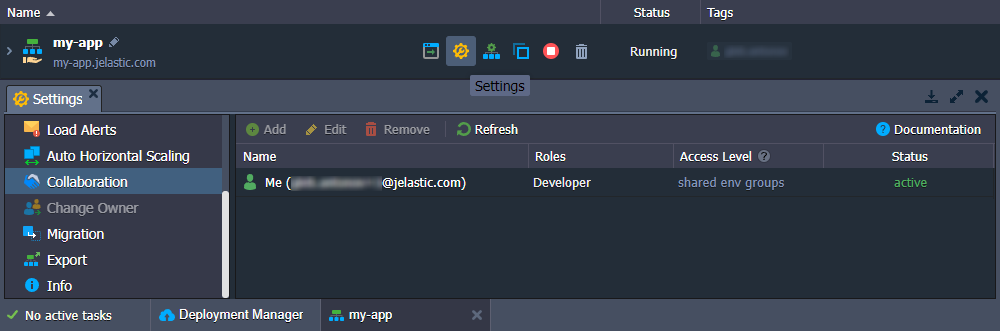
In order to check your roles for the specific shared environment, go to its Settings > Collaboration section.
Let’s go through a few examples to better understand how roles are allocated.
Example 1: Environment is not a part of any groups and not shared directly. The default role for all environments is – Viewer.
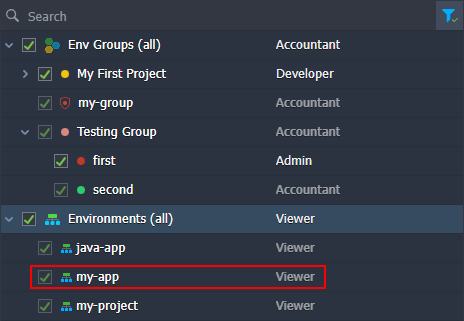
Let’s determine the access level. The environment is not shared directly and is not a part of any shared env group. However, we have a base role ( Viewer) assigned to all environments.

Result: Environment has the Viewer role.
Example 2: Environment is shared with a Viewer role and belongs to the shared group with the Admin role. Environment is a part of the categories circled in the image below.
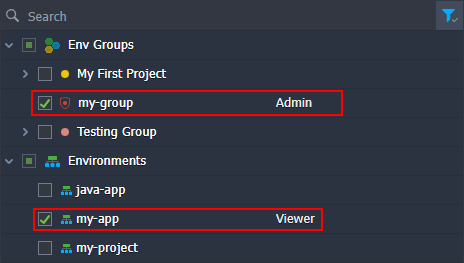
According to the algorithm, the environment has roles from two access levels: direct ( Viewer) and shared env groups ( Admin). However, only roles of the higher access level apply. The direct level has the highest priority, so roles of the shared env groups level are ignored.

Result: Only the Viewer role is assigned.
Example 3: The target environment belongs to two groups. The first one has the Developer and Accountant role (and its parent has the Admin role), while the second one has no roles. The default role for all groups is – Viewer. Environment is a part of the groups circled in the image below.
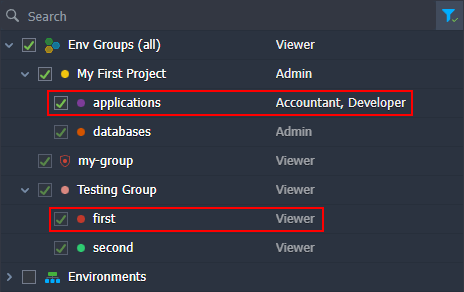
First, determine the access level. In our case, all roles are related to the shared groups and so are of the same shared env groups level. Next, check the roles for each group. The first one has direct roles ( Developer and Accountant), which are selected straight away – the parent role is ignored. The second group has no role, so the parent is checked. If all parent groups don’t have roles as well, the default group role ( Viewer) is selected.

Result: A combined list of policies from the Developer, Accountant, and Viewer roles.