When creating a MightyBox site, your staging environment with a mightybox.site subdomain automatically gets a security certificate.
However, when ready to take the site live, you would need to configure the Let’s Encrypt Free SSL Add-On.
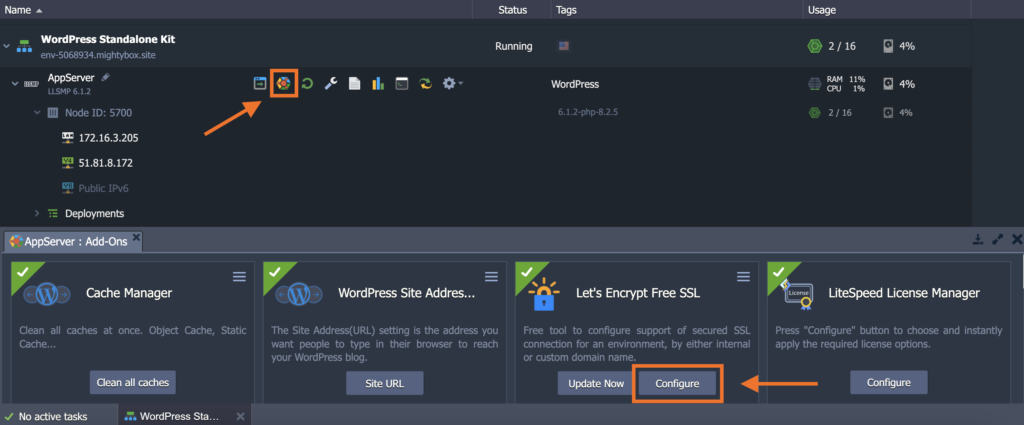
For standalone:
1. On the AppServer level, click on the hexagon icon to access the Add-Ons. Navigate to the Let’s Encrypt Free SSL Add-On and click on Configure.
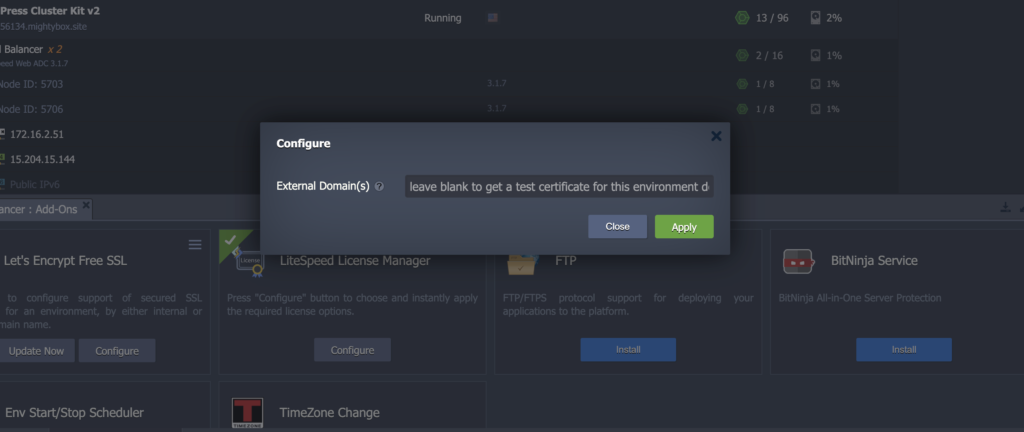
2. Add in your root domain, the www(.) version of the root domain, and your site’s staging URL. Make sure to separate all domains with a comma.
For example: mightybox.io, www.mightybox.io, env-5068934.mightybox.site

Although not necessarily required, we highly suggest adding the staging URL as well to help prevent SSL browser errors from URLs that may have not been changed during launch on your production domain.
For subdomains, (e.g. docs.mightybox.io), it is not necessary to add a www(.) version but adding the staging URL is still highly suggested.
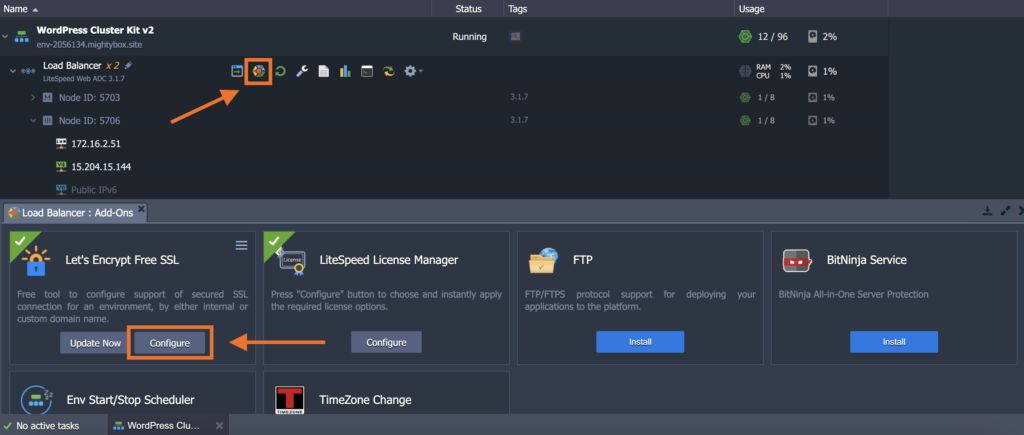
For cluster environments:
1. On the Load Balancer level, click on the hexagon icon to access the Add-Ons. Navigate to the Let’s Encrypt Free SSL Add-On and click on Configure.
2. Add in your root domain, the www(.) version of the root domain, and your site’s staging URL. Make sure to separate all domains with a comma.
For example: mightybox.io, www.mightybox.io, env-5068934.mightybox.site
Although not necessarily required, we highly suggest adding the staging URL as this will help prevent any loading errors from happening.
For subdomains, (e.g. docs.mightybox.io), it is no longer necessary to add a www(.) version but adding the staging URL is still highly suggested.